Dark Seer
Das profundezas ocultas de seu santuário, Ish'kafel, o Dark Seer, surge como mestre da manipulação gravitacional e do controle estratégico do campo de batalha.
At a Glance
Princípios-chave
“Gravity is inevitable. Position is destiny. Control the battlefield, and victory becomes not a matter of chance, but a certainty.”
Master Positioning
Your abilities define where fights happen. Vacuum creates the battlefield, Wall defends it. Perfect positioning wins before the fight begins.
Control the Flow
Ion Shell isn't just damage - it's pressure. Zone enemies, farm neutrals, control creep waves. Every tick serves your strategy.
Enable Others
Surge isn't for you alone. Speed up your carry, save your support, let your initiator position. Your power multiplies through others.
The Illusion Army
Wall of Replica does more than damage. It creates chaos, carries auras, and breaks formations. Choose illusions wisely - sometimes aura heroes beat carries.
Adapt the Battlefield
Vacuum pulls invulnerable targets. Ion Shell works on creep-heroes. Use the unique properties of your spells to create impossible situations for enemies.
Gravity's General
You don't fight enemies head-on - you manipulate where and how they fight. Be the master of position, and let enemies fight on your terms.
Visão geral do herói
Dark Seer manipula o campo de batalha e transforma caos em vitórias orquestradas. Vacuum controla posicionamento e Ion Shell mantém dano constante; ameaça em todas as fases. O facet Heart of Battle adiciona mobilidade para detectar inimigos ocultos e melhorar emboscadas.
O plano gira em criar condições perfeitas: Vacuum agrupa para combos em área; Ion Shell assedia e dá farm; Surge oferece mobilidade chave ofensiva/defensiva; Wall cria ilusões que viram lutas pelo dano e pelas auras.
Prós
- Ótimo iniciador com posicionamento do Vacuum
- Assédio constante com Ion Shell
- Surge oferece mobilidade fantástica
- Wall cria ilusões que mudam o jogo
- Muito eficaz para zonar e criar espaço
- Bom pusher e farmer com Ion Shell
Contras
- Alta dependência de mana no início
- Depende do acompanhamento do time
- Posicionamento do Wall é crítico e difícil
- Vulnerável a dispels que removem o Shell
- Impacto tardio dependente de itens
- Burst direto limitado
Análise de habilidades
Vacuum
AtivaCria um vácuo que puxa unidades inimigas para o centro, causando dano e um breve atordoamento.
Notas: Vacuum pode puxar alvos invulneráveis ou adormecidos. Perfeito para preparar combos com Wall of Replica ou habilidades em área aliadas. Pode mover unidades para fora de alguns ciclones (não Eul's). Destrói árvores numa pequena área do ponto alvo.
Ion Shell
Unidade alvoColoca uma carapaça carregada na unidade alvo, causando dano a inimigos próximos a cada segundo.
Notas: Pode ser conjurado em aliados, inimigos, creeps e até creep‑heroes. Aliados invisíveis com Ion Shell não mostram o efeito visual. Excelente para farmar neutros via aliados ou para zonar rotas. Frequentemente dissipado por oponentes atentos.

Surge
Unidade alvoConcede velocidade máxima de movimento a uma unidade por uma duração.
Notas: Uma das melhores habilidades de mobilidade. Pode ser dissipada. Não seja egoísta com Surge: use nos aliados que precisam de posicionamento. Excelente para salvar ou habilitar iniciadores.
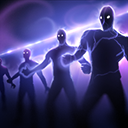
Wall of Replica
AtivaErgue uma parede que cria ilusões dos heróis inimigos que a cruzam e desacelera quem passa perto.
Notas: As ilusões carregam auras e causam dano significativo. Pode criar ilusões de heróis invulneráveis. O posicionamento é crucial: use para dissuadir avanços ou após um Vacuum bem‑sucedido. Micro‑gerencie as ilusões para focar alvos prioritários.
Heart of Battle Facet
PassivaGanha velocidade de movimento bônus ao estar próximo de heróis, incluindo ilusões.
Notas: A detecção de proximidade inclui inimigos na névoa, atuando como sistema de alerta. Use variações de velocidade para detectar inimigos próximos em ganks. Funciona em ilusões de heróis para velocidade extra.
Notas do desenvolvedor
Developer Insights
Dark Seer é um dos iniciadores mais versáteis do Dota 2. Vacuum cria posicionamento perfeito para habilidades subsequentes, enquanto Ion Shell mantém assédio constante.
Ideias chave:
- Vacuum pode puxar alvos invulneráveis
- Ion Shell no creep certo zona ondas inteiras
- Ilusões do Wall de Replica carregam auras
Pense estrategicamente e ataque com cálculo: domine o posicionamento e controlará o ritmo da batalha
Estratégia de jogo
Early Game
Timeframe: 0-15 minutes Objective: Harass enemies with Ion Shell and secure farm for core items Key: Use Ion Shell on enemy creeps for zone control; Farm jungle through allies with Ion Shell when possible; Place tower defense Ion Shells on high‑priority targets; Monitor movement speed for enemy presence detection Items: Arcane Boots (Priority #1); Null Talisman for mana efficiency; Blink Dagger components Tips: Place Ion Shell on secondary creeps for maximum duration; Use Surge aggressively for escapes and ganks; Vacuum can interrupt channeling and displace enemies; Heart of Battle facet helps detect ganks
Mid Game
Timeframe: 15-30 minutes Objective: Initiate teamfights and provide utility with Surge Key: Blink + Vacuum for perfect positioning; Coordinate with team for follow-up combos; Use Surge to enable allies or save teammates; Wall of Replica after successful Vacuum setup Items: Blink Dagger (Essential); Veil of Discord (Damage amp); Aghanim's Scepter (Double Wall) Tips: Wait for key enemy spells before using Vacuum; Ion Shell allies before fights for extra damage; Surge priority targets: your initiators and carries; Wall placement can dissuade pushes even without illusions
Late Game
Timeframe: 30+ minutes Objective: Execute perfect teamfight initiation and create space Key: Multiple Vacuum+Wall combinations with Aghanim's; Ion Shell spread across multiple targets; Surge distribution for maximum team mobility; Target aura heroes for Wall illusions Items: Refresher Orb (Double Wipes); Shiva's Guard (Armor + Control); Scythe of Vyse (Single target lock) Tips: Micro Wall illusions to target supports; Vacuum can pull invulnerable targets for setup; Ion Shell on creep heroes for sustained damage; Surge yourself to reposition between combos
Dicas e estratégias
Ion Shell Mastery
- Cast Ion Shell on enemy creeps with least aggro for maximum damage output.
- Use on invisible allies - the damage is subtle and unexpected.
- Farm neutral camps by Shelling allies at 1800+ range.
- Can break Linken's Sphere when cast on enemy heroes.
Vacuum Advanced Techniques
- Can pull Storm Spirit from Ball Lightning and heroes from Naga sleep.
- Destroys trees but won't pull from Eul's cyclone.
- Position to maximize enemy grouping for follow-up abilities.
- Can interrupt channeling spells from range.
Wall of Replica Strategy
- Place defensively to discourage pushes before they start.
- Target aura heroes over carries for more valuable illusions.
- Micro illusions immediately - they default to poor targeting.
- Can replicate invulnerable heroes during Omnislash or similar spells.
Guia de itens
Starting Items
Regeneração de mana e atributos para eficiência de conjuro no início.
Null Talisman, Tangos, Faerie Fire
Core Items
Arcane Boots resolve mana, Veil amplifica o dano do Vacuum, Blink habilita posicionamento perfeito.
Arcane Boots, Veil of Discord, Blink Dagger
Situational Items
Aghanim para Wall duplo, Shiva para armadura/controle, Force para mobilidade extra.
Aghanim's Scepter, Shiva's Guard, Pipe of Insight, Force Staff
Guia de contra
Good With
Dark Seer excels with heroes who need perfect positioning for their abilities. Enigma benefits from Vacuum grouping enemies for Black Hole, while Magnus can follow up Vacuum with devastating Reverse Polarity combinations. Earthshaker can land perfect Echo Slams on Vacuumed groups, and Faceless Void amplifies Chronosphere effectiveness with proper positioning. Phantom Assassin and other single-target carries appreciate the distraction and space created by Wall illusions. Crystal Maiden can safely channel Freezing Field behind Vacuum setup. Sand King and Leshrac benefit immensely from grouped enemies for their AoE damage. Dark Seer's ability to create the perfect battlefield scenario makes him invaluable for heroes who depend on enemy positioning.
Bad Against
Dark Seer struggles against heroes with strong dispels and burst sustained damage. Oracle and Enchantress can immediately dispel Ion Shell, removing his primary harassment tool. Enchantress can steal Wall illusions, turning his ultimate against him. Anti-Mage burns through his limited mana pool, preventing crucial spells. Bane and Shadow Demon can lock him down before he can cast spells. Nyx Assassin with Spiked Carapace can reflect Vacuum damage and silence him. Ursa and Lifestealer can burst through his relatively low health pool. Invoker can Tornado dispel Surge and use EMP to drain mana. Heroes who can dispel his buffs, drain his mana, or kill him quickly before he can position effectively pose the greatest threat.
Good Against
Dark Seer dominates heroes who rely on positioning, have multiple units, or are vulnerable to consistent damage. Illusion heroes like Phantom Lancer, Naga Siren, and Chaos Knight suffer from Ion Shell clearing illusions and Wall countering their playstyle. Channeling heroes including Enigma, Crystal Maiden, and Witch Doctor become easy targets for Vacuum interrupts. Squishy supports without escapes like Sniper, Drow Ranger, and Shadow Shaman get zoned out by Ion Shell. Immobile heroes who need careful positioning like Invoker, Tinker, and Sniper get disrupted by Vacuum displacement. Heroes dependent on creeps or summons like Chen, Enchantress, and Broodmother lose their armies to Ion Shell. Dark Seer's ability to control the battlefield, displace enemies, and provide consistent AoE damage makes him a nightmare for heroes who need perfect positioning or rely on multiple units.