Tidehunter
Once the arena champion of the sunken Ishtar Empire, Tidehunter grew weary of petty conflicts and now roams the shallows, hunting land-dwellers and seaborn alike who cross his path.
At a Glance
Core Principles
“The tide rises for no man. When your moment comes, bring the storm and let all who stand against you be swept away.”
Be the Anchor
You are the foundation your team builds upon. A perfect Ravage is the start of victory. Don't hesitate - when you see the opening, take it.
Weather the Storm
Damage is your fuel, not your weakness. Kraken Shell turns enemy aggression into your advantage. Let them waste their strongest spells on your impenetrable hide.
Master the Depths
Your abilities control the battlefield. Anchor Smash cuts through enemies, Gush weakens their defenses, Ravage ends their resistance. Understand your power depth.
Timing is Everything
Ravage has a long cooldown for a reason. Wait for the perfect moment - when enemies commit, when spells are used, when victory hangs in the balance.
Lead from the Front
You don't follow into fights - you create them. Blink first, Ravage first, absorb damage first. Your courage inspires victory.
The Rising Tide
Your presence alone distorts enemy positioning. They fear the Ravage that could come at any moment. Use this fear to control the map and dictate terms of engagement.
Hero Overview
Tidehunter is the quintessential teamfight anchor, capable of turning the tide of battle with a single well-placed Ravage. His natural tankiness through Kraken Shell and high base stats make him a formidable presence from the early game, allowing him to dominate lanes and initiate fights with impunity.
Tidehunter's gameplay revolves around survivability and perfect initiation. With Kraken Shell providing automatic dispels and damage reduction, he can wade through enemy spells to deliver devastating Ravages. Anchor Smash provides consistent AoE damage while Gush offers armor reduction to amplify your team's physical damage output.
Pros
- One of the best teamfight ultimates with Ravage
- Kraken Shell provides automatic strong dispels at damage threshold
- Excellent lane presence with Anchor Smash spam
- Great against physical damage with anchor armor reduction
- Can disrupt channeling spells and position-based heroes
Cons
- Reliant on Blink Dagger for optimal initiation
- Limited mobility without items
- Mana intensive in early laning phase
- Vulnerable to break effects that disable Kraken Shell
- Ravage has long cooldown and requires good positioning
Ability Analysis
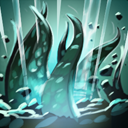
Gush
Target UnitReleases a torrent of water that slows and reduces armor of enemy units.
Notes: Always use Gush before Anchor Smash to maximize physical damage. The armor reduction makes your auto-attacks and Anchor Smash significantly more impactful. Can hit invisible enemies but won't provide true sight.
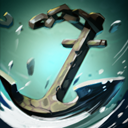
Anchor Smash
ActiveSwings his massive anchor, dealing damage and reducing attack damage of nearby enemies.
Notes: Easy to animation cancel - use stop key to bait enemies in lane. Applies instant attack effects including attack modifiers. Breaks Smoke when damaging units. Talent allows affecting buildings with damage reduction.
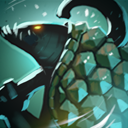
Kraken Shell
PassiveTidehunter's hide becomes extremely tough. Reduces damage taken and provides a strong dispel when damage threshold is reached.
Notes: The most powerful defensive passive in the game. Automatically strong dispels most debuffs at damage threshold. Can be disabled by break effects. Cannot dispel persistent auras or unit-based debuffs like Phantom's Embrace.
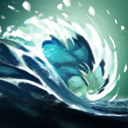
Ravage
ActiveSlams the ground, causing geysers to erupt in a large area around him, stunning and damaging all enemies.
Notes: Game-changing ultimate that wins teamfights. Has travel time as it expands outward - quick enemies can use repositioning items to escape. The AoE is a ring, not filled circle, allowing enemies to Blink inside to evade.
Dead in the Water (Shard Upgrade)
ActiveRavage creates a pool of water that applies a strong slow and provides true sight to enemies entering it.
Notes: Shard upgrade provides significant utility with true sight and movement speed slow. The fixed move speed even works on hasted enemies or those with slow resistance. Excellent against invisibility heroes.
Gush (Aghanim's Scepter)
ActiveGush launches two projectiles that bounce between enemies, applying armor reduction and slow.
Notes: Aghanim's Scepter transforms Gush into a multi-target ability. Can spread armor reduction to multiple enemies, greatly amplifying your team's physical damage output. Projectile doesn't give vision but you get vision on every unit hit.
Developer's Notes
Developer Insights
Tidehunter is one of the most reliable teamfight initiators in Dota 2. His Ravage is not just a stun - it's a game-changing ultimate that can win teamfights single-handedly.
Key Insights:
- Animation cancel Anchor Smash to bait enemies
- Use Gush before Anchor Smash for minus armor synergy
- Kraken Shell makes you incredibly resilient against burst damage
Tidehunter thrives in drawn-out teamfights. Don't be afraid to absorb damage - that's where you shine!
Game Strategy
Early Game
Timeframe: 0-15 minutes Objective: Farm Blink Dagger and establish lane dominance Key: Use Anchor Smash frequently to harass and control creep waves; Animation cancel Anchor Smash to bait enemy responses; Use Gush before trading hits for armor advantage; Play aggressive with Kraken Shell providing safety Items: Blink Dagger (Priority #1); Arcane Boots for mana sustainability; Magic Wand against spell-heavy opponents Tips: Don't be afraid to take damage - Kraken Shell will dispel debuffs; Stack ancients for later farming with Anchor Smash; Use advantage to restrict enemy farm and apply pressure; Watch for gank attempts - your initiation potential makes you a target
Mid Game
Timeframe: 15-30 minutes Objective: Initiate teamfights and control objectives Key: Use Blink + Ravage for perfect teamfight initiation; Coordinate with team for follow-up spells; Force enemies to fight on your terms; Use Anchor Smash to clear waves quickly Items: Blade Mail when being focused; Hood of Defiance against magic-heavy teams; BKB if enemy has heavy lockdown Tips: Ravage has travel time - predict enemy positioning; Use Gush on primary targets before team engagement; Save Ravage for critical moments or multiple heroes; Take towers and Roshan after successful initiations
Late Game
Timeframe: 30+ minutes Objective: Win decisive teamfights and provide front-line presence Key: Position for game-changing Ravage plays; Absorb damage and provide space for carries; Use Anchor Smash consistently in prolonged fights; Consider Refresher Orb for double Ravage in crucial fights Items: Refresher Orb for double Ravage; Heart of Tarrasque for massive health pool; Shiva's Guard for armor and team utility Tips: Ravage can win fights even when behind in gold; Use Kraken Shell to absorb enemy burst damage; Focus on initiation over damage dealing; Buy back for crucial teamfights with Ravage
Tips & Strategies
Anchor Smash Mastery
- Animation cancel Anchor Smash by immediately pressing stop - baits enemies into wasting spells or position poorly.
- Anchor Smash applies instant attack effects - lifesteal, desolator, and other modifiers proc on all targets.
- Use fake Anchor Smash animations to control enemy positioning without spending mana.
Kraken Shell Savvy
- Break effects completely disable Kraken Shell - prioritize BKB against Silver Edge or break heroes.
- The damage threshold for strong dispel is cumulative over time, not per instance.
- Cannot dispel persistent auras (Static Storm) or unit-based debuffs (Phantom's Embrace).
Ravage Execution
- Ravage expands outward - quick enemies can blink inside or use Force Staff to escape the outer ring.
- The AoE is a ring shape, not filled circle - position accordingly to maximize coverage.
- Consider baiting enemies into clumping before using your ultimate for maximum impact.
Item Guide
Starting Items
Quelling Blade for better last hits, Tangos for lane sustain, and Magic Stick against spell-heavy opponents who spam Anchor Smash.
Quelling Blade, Tangos, Magic Stick
Core Items
Blink Dagger is essential for Ravage initiation. Arcane Boots solve mana issues, Magic Wand provides burst healing against spell-heavy lineups.
Blink Dagger, Arcane Boots, Magic Wand
Situational Items
Blade Mail when being focused, Hood against magic damage, Force Staff for positioning, BKB when enemies have heavy disables.
Blade Mail, Hood of Defiance, Force Staff, Black King Bar
Counter Guide
Good With
Tidehunter excels when paired with heroes who can capitalize on his massive AoE initiation. Earthshaker and Magnus create devastating combos with their own AoE follow-ups after Ravage. Enigma benefits from Tidehunter's ability to group enemies perfect for Black Hole. Faceless Void can Chronosphere enemies who survive the initial Ravage. Crystal Maiden and Jacob can safely channel their ultimate spells behind Tidehunter's tanky presence. The synergy is clear - heroes who benefit from grouped or disabled enemies become exponentially more effective with Tidehunter's game-changing initiation.
Bad Against
Tidehunter struggles against heroes who can neutralize his core strengths or exploit his weaknesses. Viper and Shadow Demon apply break effects, completely disabling Kraken Shell and removing his main defensive tool. Bane can grip through Ravage or use Fiend's Grip to prevent initiation. Oracle can save allies from Ravage with False Promise and dispel crucial debuffs. Silver Edge carriers are particularly dangerous as break on hit eliminates Kraken Shell. Anti-Mage burns Tidehunter's limited mana pool, preventing crucial Blink initiations. Heroes with strong kiting abilities like Vengeful Spirit and Drow Ranger can stay at range while damaging Tidehunter. The pattern is heroes with break effects, strong dispels, mana burn, or superior mobility pose serious threats.
Good Against
Tidehunter dominates heroes who rely on positioning, multiple units, or channeling spells. Illusion heroes like Phantom Lancer and Chaos Knight suffer immensely - Anchor Smash cleaves through illusions while Ravage can hit the real hero among clones. Channeling heroes such as Enigma (Black Hole), Crystal Maiden (Freezing Field), and Witch Doctor (Death Ward) become immediate targets for interruption. Position-dependent carries like Sniper and Drow Ranger lose their safety when suddenly stunned and forced into melee range. Melee carries who need to commit to fights trigger multiple Kraken Shell procs while being vulnerable to Anchor Smash's damage reduction. Heroes dependent on setup like Earthshaker find their combos disrupted. Tidehunter's ability to force fights through Ravage and survive initial burst makes him a nightmare for these hero types.