Centaur Warrunner
Bradwarden the Warrunner rose to dominance on the proving grounds of Omexe, an ancient arena where centaur clans have gathered for millennia. As the greatest gladiator among centaur warriors, he composes masterpieces in combat, turning every battle into a work of art.
At a Glance
核心原则
“The arena has no room for hesitation. Every step, every strike is calculated. Follow these principles, and victory becomes not a possibility, but an inevitability.”
Embrace the Pain
Double Edge's self-damage is not a weakness - it's an investment in suffering. Every point of damage you take comes back twofold through Retaliate and tower Valencia.
Control the Engagement
You decide where and when battles happen. Blink-Stomp initiations, Stampede ganks, and tank positioning make you the master of the battlefield geometry.
Global Presence
Stampede isn't just mobility - it's global influence. Save teammates, initiate fights, and control objectives across the entire map.
Tower as Weapon
Fortifications are your tools. Draw tower aggro, reflect the damage, and turn enemy defenses into offensive weapons through Retaliate.
Calculated Aggression
Every Double Edge, every tower dive, every initiation has a purpose. Calculate the risks, execute with precision, and let your opponents wonder how you survived.
The Unbreakable Wall
You are the foundation your team builds upon. Absorb the punishment, create the space, and watch as your victory becomes inevitable through your resilience.
英雄概览
Centaur Warrunner is the quintessential frontline tank and initiator, capable of absorbing tremendous punishment while dishing out devastating area damage. His unique combination of self-damage nukes, damage return, and global mobility makes him a strategic nightmare for opponents who must constantly calculate whether engaging is worth the cost.
Centaur's gameplay revolves around strategic positioning and calculated aggression. Double Edge serves as both your primary damage source and push tool, while Retaliate turns enemy attacks against them. The ultimate ability, Stampede, provides unparalleled team mobility and can turn engagements from across the map. Your success depends on knowing when to absorb damage and when to unleash your full arsenal.
优点
- Double Edge costs no mana - excellent for pushing
- Retaliate damages towers and reflects all incoming damage
- Global presence with Stampede ultimate
- Excellent tank with natural strength growth
- Can enable allies with Agh's Scepter - completely invulnerable hitch rides
缺点
- Double Edge self-damage requires careful health management
- Vulnerable to heroes who can bypass Retaliate
- Mobility highly dependent on Stampede cooldown
- Can struggle against high burst damage
- Requires good positioning to maximize effectiveness
技能解析
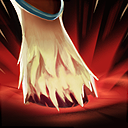
Hoof Stomp
ActiveCentaur slams the ground with his hooves, stunning and damaging nearby enemy units.
备注: Primary initiation tool combined with Double Edge. The AoE stun allows you to set up perfect positioning for your other abilities. Use it to interrupt channeling spells or catch multiple enemies.
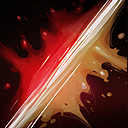
Double Edge
ActiveCentaur strikes himself with such force that it damages nearby enemies.
备注: Your main damage and pushing tool. Since it costs no mana, use it liberally to clear creep waves and teamfight. The self-damage is mitigated by your high HP pool and regeneration. Excellent synergy with Retaliate.

Retaliate
ActiveCentaur immediately counterattacks any unit that attacks him, damaging them based on the damage they dealt.
备注: Turns tower aggro into offensive advantage. Draw tower shots intentionally while pushing - the reflected damage adds up quickly. All returned damage credits Centaur as the source, making it great for securing kills.
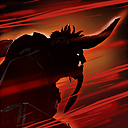
Stampede
ActiveCentaur leads all allied heroes into a charge, granting bonus movement speed and trampling enemy units. Enemies who are trampled take damage and have their movement speed slowed.
备注: Game-changing ultimate with global impact. Can be used to save teammates from across the map or作为 surprise initiation. All stampeding units apply the slow - coordinate with your team for maximum impact. Cannot be dispelled once started.

Double Edge (Shard Upgrade)
ActiveDouble Edge reduces enemy armor by 3/4/5/6 for 6 seconds in a 450 area.
备注: The Shard upgrade transforms Double Edge into a teamfight weapon. The armor reduction amplifies all physical damage from your team, making it incredibly valuable for bursting down tanky targets.

Hitch a Ride (Aghanim's Scepter)
ActiveCentaur can target an allied hero to make them completely invulnerable for the duration of Stampede.
备注: Game-changing utility that can completely negate enemy assassination attempts. Make an ally invulnerable to Faceless Void's Chronosphere, Black Hole, or other devastating abilities. The matchmaking potential is enormous.
Developer's Notes
Developer Insights
Centaur Warrunner is the embodiment of calculated aggression and battlefield control. His Double Edge provides massive area damage at no mana cost, making it one of the most efficient push spells in the game.
Key Insights:
- Retaliate makes tower damage hurt back - draw aggro intentionally
- Stampede is a game-changing global mobility tool
- Double Edge costs no mana - use it liberally for pushing
Centaur rewards confident, tank-focused play. You are the frontline that defines where battles happen!
对局策略
Early Game
Timeframe: 0-15 minutes Objective: Establish lane dominance and farm core items Key: Use Retaliate to trade favorably with harass; Double Edge creep waves for fast pushing; Draw tower aggro strategically for tower damage; Maintain aggressive positioning to control the lane Items: Hood of Defiance (Priority #1); Arcane Boots (Mana sustain); Blink Dagger (Initiation tool) Tips: Don't be afraid to take tower shots with Retaliate active; Double Edge costs no mana - use it to push waves into enemy tower; Stack camps and clear them with Double Edge + Retaliate; Watch for gank opportunities when enemy overextends
Mid Game
Timeframe: 15-30 minutes Objective: Initiate teamfights and control objectives Key: Blink-Stomp-Edge combo for initiation; Use Retaliate to damage towers during sieges; Save teammates globally with Stampede; Coordinate ganks with your mobility advantage Items: Blink Dagger (Essential for combos); Blade Mail (Synergizes with Retaliate); Pipe of Insight (Team magic protection) Tips: Watch your health before Double Edging - you need HP to tank; Stampede can be used to rescue allies across the map; Tower dive with Retaliate for massive damage output; Blink positioning is crucial - initiate from unexpected angles
Late Game
Timeframe: 30+ minutes Objective: Win teamfights through superior initiation and utility Key: Use Agh's Scepter to make key allies invulnerable; Initiate on enemy cores while protecting your carries; Provide global mobility with Stampede; Become the frontline anchor your team needs Items: Aghanim's Scepter (Game-changing utility); Heart of Tarrasque (Survivability); Shiva's Guard (Team utility and armor) Tips: Hitch a Ride can completely negate enemy ultimates; Late game Double Edge shreds through high armor targets; Your role shifts from damage to utility and tanking; Coordinate Stampede initiations with team positioning
技巧与策略
Double Edge Mastery
- Never hesitate to use Double Edge for pushing - no mana cost means unlimited potential
- The self-damage is easily mitigated with Hood of Defiance and your natural regen
- Combine with Retaliate after drawing tower aggro for massive damage output
- In teamfights, position to hit multiple heroes - the AoE damage is substantial
Retaliate Tactics
- Intentionally draw tower aggro to damage towers - this accelerates pushing significantly
- Force tower aggro by right-clicking enemy heroes or being the closest attacking target
- All returned damage credits you, making Retaliate great for securing kills on fleeing enemies
- Against physical carries, Retaliate can be your primary source of damage
Stampede Strategy
- Use Stampede to save allies from across the map - the global presence is game-changing
- All allied units (except wards) gain the speed buff and apply the slows
- Agh's Scepter makes an ally completely invulnerable - perfect for dealing with ultimates
- Coordinate ganks by stampeding in unexpected when enemies think they're safe
出装指南
Starting Items
Build towards Hood of Defiance while maintaining lane presence. Stout Shield synergizes perfectly with Retaliate.
Stout Shield, Tangos, Circlet
Core Items
Arcane Boots solves your mana issues, Blink enables Blink-Stomp-Edge combos, Hood mitigates Double Edge self-damage and enemy magic.
Arcane Boots, Blink Dagger, Hood of Defiance
Situational Items
Blade Mail punishes focus fire, Pipe provides team magic protection, Force Staff for repositioning, Shiva's for armor and control.
Blade Mail, Pipe of Insight, Force Staff, Shiva's Guard
克制指南
Good With
Centaur excels when paired with heroes who can capitalize on his initiation and area control. Earthshaker creates devastating combos after Centaur's setup, with Fissure + Echo Slam on grouped enemies. Magnus can follow up Centaur's initiation with Reverse Polarity for massive teamfight devastation. Shadow Fiend benefits immensely from Centaur's ability to initiate and tank while SF rains Requiem of Souls. Enigma can land perfect Black Holes on enemies grouped by Centaur's combos. The key is heroes who need enemies to be positioned or disabled - Centaur provides exactly that through his stuns, slows, and tanking presence.
Bad Against
Centaur struggles against heroes who can neutralize his core strengths or exploit his self-damage. Nyx Assassin reflects Double Edge damage back through Spiked Carapace, potentially killing Centaur with his own nuke. Viper applies Nethertoxin break, completely disabling Retaliate and reducing healing. Illusion heroes like Phantom Lancer can overwhelm Retaliate with too many targets, while Medusa's Split Shot won't trigger Retaliate unless she's primary target. Heroes with mana burn like Anti-Mage can prevent Centaur from using his spells consistently. High burst damage heroes can kill Centaur before he can properly utilize his tank potential. The pattern is clear: heroes with reflection abilities, break effects, overwhelming illusions, or burst magic damage all pose serious threats to Centaur's effectiveness.
Good Against
Centaur dominates heroes who rely on mobility, channeling, or single-target damage. Squishy heroes like Queen of Pain, Sniper, and Crystal Maiden are easy prey for Blink-Stomp-Edge combos. Channeling heroes such as Witch Doctor, Shadow Shaman, and even Enigma can be interrupted mid-channel with Hoof Stomp. Physical damage dealers who need to focus one target like Ursa and Phantom Assassin trigger Retaliate massively, essentially killing themselves. Tower-diving heroes like Pudge and Clockwerk struggle against Centaur's ability to tank towers while dealing damage back. Heroes dependent on positioning like Tinker and Storm Spirit lose their advantage when caught by Centaur's initiation. Centaur's combination of area damage, tankiness, and global mobility makes him a nightmare for anyone who likes to play hit-and-run or needs to stay mobile to survive.